Electric Bike Controller (Everything You Wanted To Know)
When purchasing an electric bike, the e-bike controller is not typically the first thing we check. However, what does an e-bike controller do?
As a whole, the electric bike controller is considered the brain of the electric bike. It connects all the electrical components, including the battery, motor, sensors, LCD, etc. Without it, your electric bike won’t function as it should.
The e-bike controller may not be most commonly checked part when purchasing an e-bike, but it is the most important one. This article will delve into the electric bike motor controller, what it does, and why it is important.
What Does an eBike Controller Do?
Generally, the electric bike motor controls the critical functions of an electric bike. It receives information from the parts of the e-bike (i.e., battery, throttle, motor) and responds with the right and corresponding output. For instance, as you press the throttle, the controller receives the information, draws energy from the battery, and delivers that power to the e-bike motor, allowing it to work and propel your electric bike.
Listed below are some of the functions of an electric bike controller:
- Regulates Current and Voltage
- Controls Power Output to the Motor
- Manage Speed
- Controls Throttle and Pedal Assistance Level
- Has Safety Features to Protect the eBike System
- User Interface Interaction
eBike Controller Helps in Regulating Current and Voltage
Once the e-bike controller receives information from any connected parts, it draws energy from the battery. The controller then regulates the current and voltage received from the battery to ensure compatibility with the motor and other connected components. It is always best to have an e-bike controller with a voltage range similar to the motor. A compatible controller ensures your battery and motor will operate satisfactorily, optimizing their performance.
eBike Controller Controls the Power Output to the Motor
Based on the information that the controller receives from any of the components of the electric bike, the controller draws energy from the battery and sends power output to the motor accordingly. The motor converts the electrical energy into mechanical power, propelling your electric bike forward.
eBike Controller Manages the Speed of the Electric Bike
The e-bike controller can also manage or limit the speed of the electric bike. Once you set the maximum speed on your LCD, the e-bike controller draws power from the battery and sends power to the motor following the speed set. When selecting the top speed, always check your local and state laws regarding electric bikes to avoid any potential legal consequences. You can also refer to our article entitled ‘Are Electric Bikes Street Legal (Detailed Info: All 50 States)‘ for more information.
eBike Controller Controls the Throttle and Pedal Assist level
The eBike controller controls the throttle and pedal assist level of electric bikes. Electric bikes are commonly equipped with pedal assistance levels, ranging from 3 to 7 or more. The highest level indicates the maximum assistance the motor can provide.
Some electric bikes use riding modes instead of pedal assistance levels. In these systems, once you set the desired assistance level, sensors detect it, and the controller draws power from the battery to provide the necessary power output to the motor.
Additionally, certain electric bikes are equipped with throttles, which can be twisted or pressed throttles. Twist throttles are engaged by twisting the grip, while press throttles are engaged by pressing a thumb-sized button. When you twist or press the throttle, it sends a signal to the controller, which draws power from the battery to provide the required power output to the motor.
Has Safety Features to Protect the eBike System
Few electric bike controllers are now equipped with advanced technology to offer safety features for the e-bike system. Some of these safety features include low-voltage, high-voltage, over-temperature, over-current, and brake protection.
When the controller detects the battery voltage dropping too low, it shuts down the motor to protect it from over-discharge. The controller will also shut down the motor when over-voltage occurs. In the case of a high increase in temperature, the controller will shut down the motor to protect both the motor and transistors. Additionally, in the event of an overflow of current, the controller will reduce the current flow to regulate it, preventing severe damage to the motor and transistors. Moreover, when braking, the controller shuts down the motor to ensure that the e-bike stops immediately, prioritizing the rider’s safety.
User Interface Interaction
Most electric bikes have control panels or LCD displays where you can find information such as your speed, battery level, distance traveled, selected assistance, and more. With these, you’ll be able to set the settings of your electric bike. Once set, the information is delivered to the controller, and the controller responds accordingly.
“An electric bike is a passport to adventure.” – Unknown
How to Test an eBike Controller?
As a general rule, you can test your electric bike controller using either a multimeter or an e-bike tester. These methods are easy to use and can help you determine whether your electric bike controller is working well.
If you observe a change in the performance of your motor and battery, or if the LCD does not function, you can test your e-bike controller to determine if the issue lies with it. Initially, you can attempt to reset the e-bike controller. If that doesn’t resolve the problem, you can further check the controller using a multimeter or an e-bike tester.
Using a Multimeter to Test an eBike Controller
It would be great to have a multimeter that can test both the continuity and resistance of the controller. The continuity test determines if there is a short connection or possible interruptions in the circuit that significantly affect the controller’s functionality. On the other hand, the resistance test checks the resistance in the current flow. You can follow the steps below to test your e-bike controller with a multimeter:
- Make sure you have the equipment ready.
- Set up the multimeter. Connect the black wire to the negative terminal of the battery.
- Choose what to test first: either continuity or resistance. For continuity, set your multimeter to continuity; for resistance, set it to resistance mode.
- Suppose you are going to do the continuity test first. Connect the multimeter to every wire of the controller. This will determine which wire is faulty. If you hear a beeping sound, there’s a short in the wire. If you hear none, then your wires are working well.
- Suppose you are going to check the resistance. Ensure that you set up your multimeter in resistance mode. Unlike continuity, the multimeter will show you digits in the resistance test. Just like in continuity, check every wire. If the number displayed is eight kilohms or higher, then the connection is good. However, if it is below eight kilohms, you have a faulty connection.
If there is an issue with one or more connections in your e-bike controller, it may be time for you to change the electric bike controller. Alternatively, you can contact a professional technician to have your controller fixed. If you are capable, you can also choose to do it yourself.
To learn more on how to test your e-bike controller, watch the video below:
If you don’t own a multimeter yet, you can check for multimeters online or purchase one from a nearby store. Here are some multimeters you can find online:
Using an eBike Tester to Test an eBike Controller
Another method for testing your electric bike controller is using an e-bike tester. An e-bike tester tests your e-bike controller and the other components of your electric bike. Here are the steps you have to follow in testing your e-bike controller using an e-bike tester:
- Ensure that you have the necessary equipment prepared for testing.
- Safely disconnect the eBike controller from the electric bike.
- You have to check the throttle signal to assess the controller’s functionality.
- Connect the throttle wire to the controller.
- Then, connect the e-bike tester to the electric bike controller.
- Power up the eBike tester to initiate the testing process.
- Activate the throttle to start generating signals.
- Examine the light signals on the e-bike tester. A flashing light indicates normal operation, but if only the middle light works, there may be an issue with the eBike controller.
Here are some electric bike testers you can find online.
| eBike Tester | Cost |
| Fafeicy e-bike tester | $15.90 |
| QOONESTL Electro Car E-Bike Scooter Brushless Motor Controller Tester | $11.99 |
| Acxico Electric Car E-Bike Scooter Brushless Motor Controller Tester | $13.69 |
| Electro Car E-Bike Scooter Brushless Motor Controller Tester | $13.99 |
| E-bike Scooter Brushless Car Motor Controller Tester | $12.89 |
| Ebike Scooter Brushless Car Motor Controller Tester | $16.61 |
| E-Bike Testing Device | $20.09 |
How Long Does an eBike Controller Last?
On average, an electric bike controller has a lifespan of about three to four years. This duration may vary, depending on your electric bike’s quality, overall usage, and maintenance. When it is no longer working, the e-bike controller can be replaced.
Just like any components of an electric bike, such as the battery and motor, the e-bike controller also experiences wear and tear over time. A high-quality controller would typically last even longer when well-maintained and used properly. So, when choosing an e-bike or a controller, although quality-checking is essential, proper use and maintenance are equally important.
Note that the e-bike controller is considered the brain of the electric bike. It connects all the electrical components of the electric bicycle. It’s the component that draws energy from the battery, regulating the current and voltage so the motor will work accordingly. When it’s no longer working, you won’t be able to use the electrical components of your electric bike. However, you can still ride it just like a regular bicycle.
However, you don’t have to worry. When the time comes that the controller reaches its limit and no longer works, you can opt to replace it with another one. Just ensure that it is compatible with your motor and battery.
Can I Change an eBike Controller?
As a general rule, you can change an electric bike controller once it’s no longer working. Before making a purchase, it’s advisable to consult your electric bike manufacturer to ensure compatibility with your specific e-bike model.
Replacement controllers are available for purchase online or at your nearest store. However, before purchasing a replacement, it is always best to read your e-bike manual or reach out to your e-bike manufacturer to determine if there are specific e-bike controllers that your e-bike is required to use.
Always follow safety precautions when replacing an electric bike controller, as your safety should be prioritized. If you plan to change your e-bike controller to modify some functions of your e-bike, it would be best to consult a professional, especially if you have little or no knowledge. Keep in mind that modifying anything on your e-bike may void your warranty.
Here are some electric bike controllers you can buy on Amazon:
| eBike Controller | Cost | Power | Current Limit | Voltage Compatibility |
| Keenso E-Bike Metal Motor Brushless Controller | $55.69 | 1000W-1500W | 26A-32A | 48V, 60V, 64V, 72V |
| DOMINTY Electric Bicycle Brushless Speed Motor Controller | $63 | 2000W | 45A | 48V-72V |
| Cozyel Electric Bicycle Brushless Motor Speed Controller | $62.96 | 2000W | 45A | 48V-72V |
| Yinhing Ebike Controller with LCD Display Panel | $42.11 | 250W/350W | – | 36V, 48V |
| Dilwe Motor Brushless Controller + LCD Display | $52.15 | 350W | – | 36V/48V |
| Dilwe Brushless Controller | $27.26 | 350W | 13A | 36V/48V |
| Opaltool E-Bike Brushless Motor Controller | $21.99 | 350W | 18A | 36/48V |
How Do I Change an eBike Controller?
- Turn off the e-bike.
- Check the location of the e-bike controller.
- Disconnect all the wires.
- Remove the old e-bike controller.
- Install the new e-bike controller.
- Reconnect all the wires.
- Reconnect the e-bike battery.
- Turn on the e-bike.
- Configure settings if needed.
Before you proceed with any step, ensure that you have every piece of equipment needed. Some of the equipment may include but is not limited to, a new electric bike controller, wrenches and screwdrivers, and zip ties.
Note that the equipment needed may vary depending on your e-bike design.
1. Turn Off the eBike
Do not forget to turn off your electric bike. It would be even better to disconnect the battery from the e-bike, if possible. Electric bicycles have components that carry electrical currents. Turning off your electric bike as you change the controller is essential to prevent electric shock. Additionally, if the e-bike is turned on, there’s a chance that you will accidentally activate any part, such as the throttle.
2. Check the Location of the eBike Controller
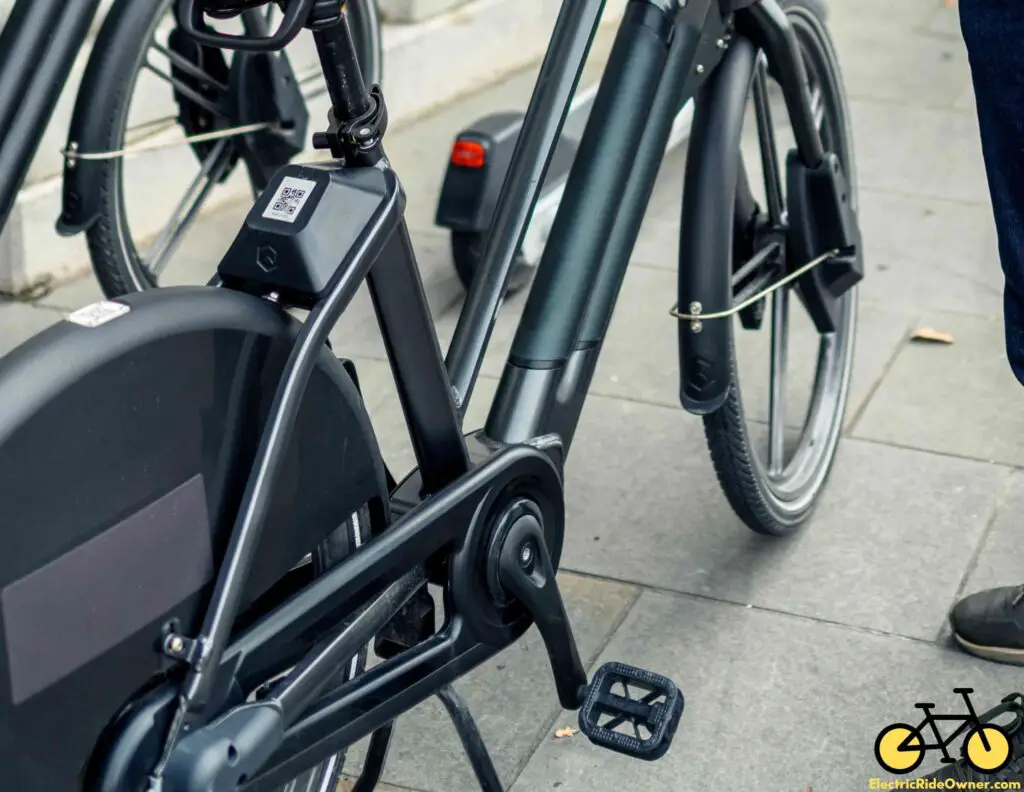
Check the location of the existing electric bike controller. It is typically located within the frame or near the battery. However, the location may vary depending on your electric bike model.
3. Disconnect All the Wires
The electric bike controller is considered the brain of the electric bike, connecting all the electrical components of the e-bike. Therefore, to replace the controller, you need to disconnect the wirings so you can remove it from the e-bike.
4. Remove the Old eBike Controller
Some electric bike models have e-bike controller housings that are secured with screws. In this case, you need to remove the screws and open the e-bike controller case housing first, so you can safely remove the old electric bike controller.
5. Install the New eBike Controller
After removing the old e-bike controller, you can install the new one. Place it in position and lock the controller case housing. Secure the case by reinstalling all the screws. If your controller has no case housing, you can secure it using straps or zip ties. Alternatively, it would be best to purchase a case housing to ensure that your controller is safe and secure.
6. Reconnect All the Wires
Once the new e-bike controller is installed, you can reconnect all the wires to the new controller. Make sure that the wires are connected properly and correctly. Secure them with zip ties, if needed.
7. Reconnect the eBike Battery
If you have removed the battery from your electric bike, reconnect it before testing the electric bike.
8. Turn On the Electric Bike
Once everything is secured and connected, you can turn on your electric bike and check if everything works.
9. Configure Settings if Needed
Since your electric bike controller is new, you might need to configure your settings. Once done, you can test-ride your electric bike.
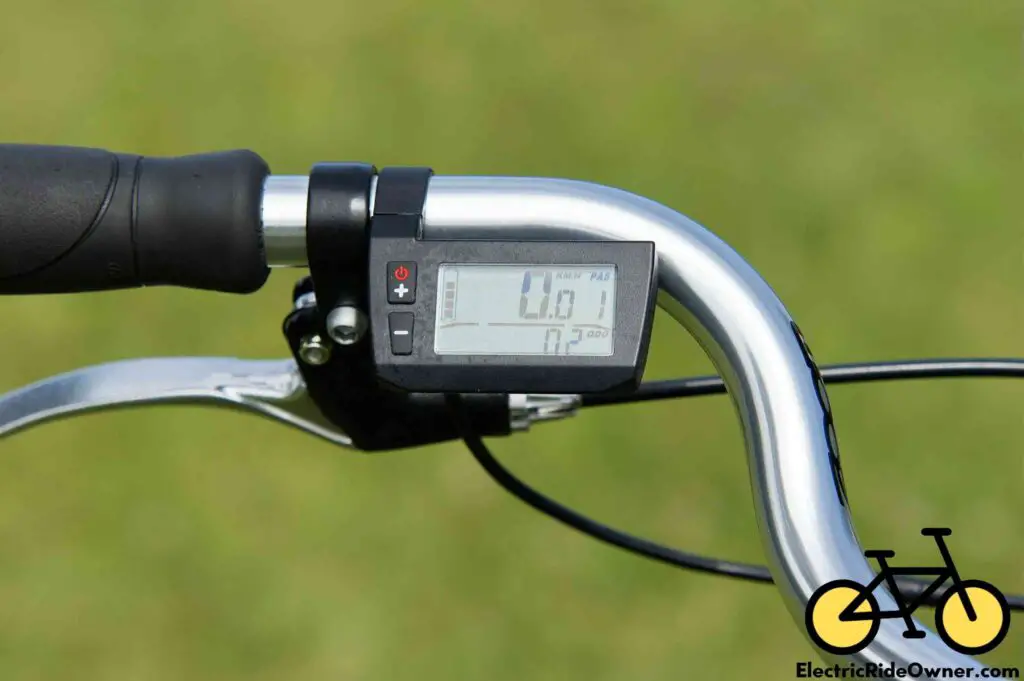
How to Setup eBike Controller Settings?
As a general rule, you can set up your electric bike controller settings through your LCD. Setting up an e-bike controller may vary depending on your electric bike model, as they may have different LCD displays, controllers, and features.
Setting up your controller settings through LCD displays is often done by pressing some buttons or touching the screen (if the LCD display is a touchscreen). However, some general steps may be the following:
Your instructions are clear, but I made some minor corrections for clarity:
- To turn on the LCD display, long-press the power button.
- Once turned on, you can access the setting page by pressing the up and down buttons for 2-3 seconds.
- Electric bikes have varied LCD displays, so they may have different parameters. Once you are on the setting page, you can choose the parameter you want to change.
- Once done, you can exit the setting page by pressing the up and down buttons for 2-3 seconds.
You can also watch the video below for more insights.
What Size of Controller Do I Need?
As a whole, the size of the electric bike controller you need depends on your electric bike. Any size will do as long as it fits in the designated location. The most important thing to consider is the compatibility of your e-bike controller with all electrical components of the e-bike.
Electric bike controllers come in different sizes. They also differ in voltage, current rating, and power. Though physical fit is essential when choosing an electric bike controller, compatibility with the controller must always come first. When planning to replace your electric bike controller, always ensure that the voltage, current rating, and power are compatible with the battery and the motor. Additionally, some electric bikes have additional features that may not be very common to other e-bikes. In that case, choosing an e-bike controller for that specific e-bike is recommended. So, it would be best to read your e-bike’s manual or contact your e-bike manufacturer.
How Do I Choose an eBike Controller?
On average, you can choose an electric bike controller by considering the compatibility of the controller with your motor, battery, and other electrical components. You can check the existing controller of your e-bike and choose a new e-bike controller that is the same.
Electric bike controllers differ in size, voltage rating, current rating, power, and the number of wires. It is recommended that you purchase a new e-bike controller that is the same as your existing e-bike controller as much as possible. That way, you can be confident that your controller will work well with your electric bike’s electrical parts.
If you can’t find the same e-bike controller, it is recommended to check your battery and motor to ensure that you purchase an e-bike controller that is compatible with your motor and battery. Compatibility is crucial to ensure your electric bike works perfectly and performs at its best. Opting to use an incompatible controller may damage the motor, battery, or other electrical components of the e-bike.
So, when purchasing an e-bike controller, ensure that your controller has the same voltage as your motor and battery. It would also be advisable to choose a controller with a current rating lower than the battery’s output current. Another thing to consider is the type of controller you would like. Controllers are brushed or brushless, so choosing the right one is essential.
Since controllers have different features, it is recommended that you choose an e-bike controller that is suitable for your electric bike components. And, of course, do not forget about the size and form of your controller as the physical fit of the controller is also essential.
Are All eBike Controllers the Same?
On average, all-electric bike controllers are not the same. E-bike controllers differ in size, form, voltage rating, current rating, power, and features. That is why knowing the suitable controller for your e-bike is essential.
Various electric bikes are on the market, and multiple controllers are made to accommodate these differences. The controller used by e-bike manufacturers depends on their motor and battery capacity, as the controller should be compatible with these e-bike components. For instance, a high-voltage motor should be paired with a high-voltage electric bike controller.
Aside from the controllers’ current, voltage, and power rating, they also differ in quality. In most cases, those from high-end brands typically have high-quality controllers, but the price range can be high. However, there could also be cheaper ones that have excellent quality.
Since not all electric bike controllers are the same, several factors should be considered when planning to purchase one.
How Do I Know What eBike Controller I Have?
As a general rule, you can determine what electric bike controller you have through the following:
• Checking your electric bike manual
• Inspecting your electric bike controller
• Visiting the manufacturer’s website for information
• Reaching out to the e-bike’s manufacturer or the store where you bought your e-bike
• Asking friends or checking online
• Consulting a professional technician
There are many ways to know what e-bike controller you have. The very first thing to do is to check your e-bike manual. E-bike manuals are always included when you purchase your electric bike. The e-bike’s manual contains information about your electric bike components, including the controller.
If you don’t have the manual, you can physically inspect your e-bike controller. Remove it from your electric bike so you can check it clearly. However, if you can’t find any critical information, you can also visit the website of the e-bike manufacturer. Look for your e-bike model and check its specifications. If the information you seek is not there, contact the e-bike manufacturer via email or phone. You can inquire about any information you want to know. However, be aware that response times vary among manufacturers. Some may reply within 24 hours, while others may take about a week, and others may not.
If you have friends knowledgeable about electric bikes, you can ask them for help. Alternatively, you can inquire in online forums. Seeking professional assistance is also an option.
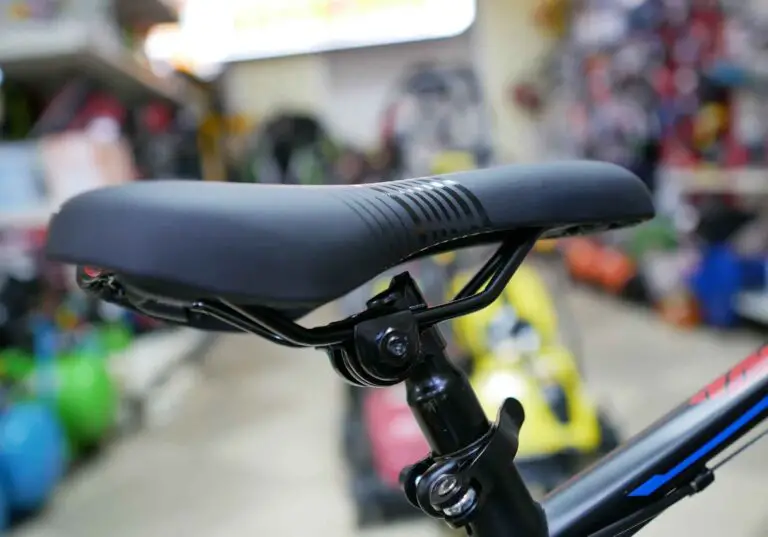
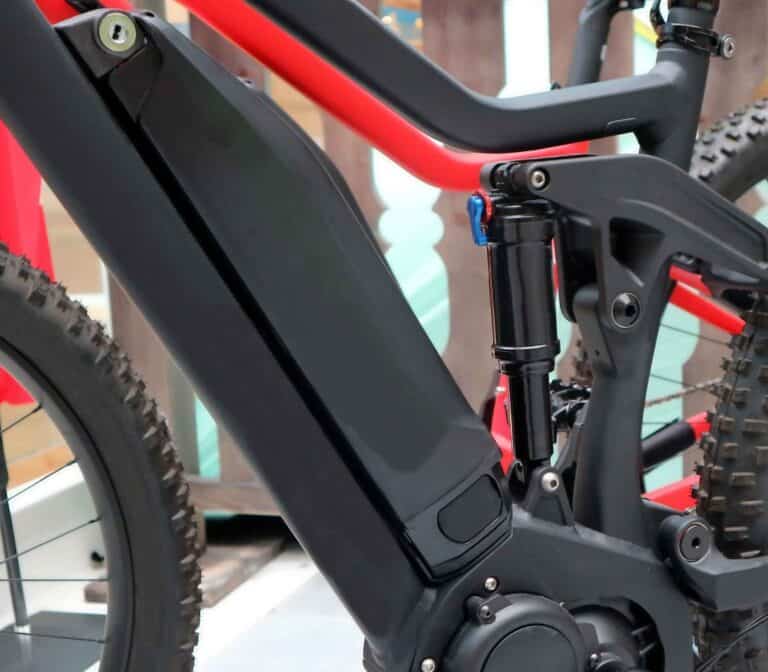
Where Should I Put My eBike Controller?
As a general rule, it would be practical to place your new controller in the location where it was previously located. You can also put it in an area where the functionality of the electric bike won’t be hindered.
Here are some of the locations where you can place your electric bike controller:
- Designated compartment
- Seat tube
- Under the top tube
- Downtube
Some electric bikes have a designated compartment for the electric bike controller. If your electric bike has this, it is typically within the frame. So, you have to check your electric bike for this. This is great since you wouldn’t worry about where to place your controller. You would know that the compartment would help keep your controller free from dirt, water, and other elements that could damage it.
Another location where you can mount your e-bike controller is the seat tube. You have to check your e-bike design to ensure you have enough space for it. This is preferably suitable for e-bikes with mid-drive or rear-hub motors. Purchasing an e-bike controller case housing would also be better to protect your controller from dirt, mud, debris, and water.
You can also place your e-bike controller under the top tube. However, since not all electric bikes have the same frame style, you must check your e-bike design first. If it is doable, it would also be great to consider if the controller would be close enough to connect the wiring from your motor, battery, and other electrical components.
Another place where you can mount your electric bike controller is on the downtube. This location is primarily preferable for electric bikes with front hubs or mid-drive motors. It’s a great location since it’s far from your legs when you pedal. You just have to ensure the controller is close enough to the battery and motor.
When choosing the controller’s location, you should consider several factors so you can ride your electric bike comfortably. The first thing you must consider is your electric bike’s design. E-bikes differ in size and design, so some may not have adequate space for a new location of the controller.
Accessibility should also be considered. Since e-bike controllers connect the wiring of your electric bike, it would be great to place your controller in an area close to the wires that need to be connected.
Another thing to be considered is the security and safety of your controller. Note that the controller deals with wiring, so place it in a location where it is protected from any elements such as dirt, mud, and water. It would be a great idea to purchase a controller housing casing to have peace of mind when riding, and having your wirings secured with zip ties is also recommended so they won’t hinder your riding. Some additional things to be considered are the weight distribution and aesthetics.
How to Keep eBike Controller Cool?
On average, you can keep your electric bike controller cool through the following:
- Install an e-bike controller cooling system.
- Place it in a location where there is proper air circulation.
- Avoid exposure to direct sunlight.
- Ride your e-bike carefully and responsibly.
- Use a compatible controller.
One of the best ways to keep your e-bike controller cool is by installing a controller cooling system. If you need to learn how to do it, it would be great to consult a professional technician. Another thing to consider is checking the location of your e-bike controller. Ensure that the controller is located in an area with enough airflow.
Additionally, it would help if you did not expose your controller to direct sunlight, as it could overheat. Avoid excessive use of the electric bike, as too much load, speed, or acceleration could cause heating. Moreover, checking whether your controller is compatible with your motor and battery would be great to prevent overheating.
How Do I Stop My eBike Controller from Overheating?
As a general rule, you can stop your electric bike controller from overheating by using a cooling system, placing it in a location with proper airflow, avoiding sunlight exposure, and riding your electric bike responsibly.
If you observe that your electric bike controller keeps overheating, you can first check if it’s working properly. Sometimes, a faulty controller tends to overheat. If nothing is wrong with it, you can try installing a cooling system for your controller. It would also help to change its location to an area with proper airflow. Additionally, sometimes, riding your electric bike in hot temperatures can cause overheating. So, try riding your e-bike in cooler temperatures, observe what happens, and avoid exposing your e-bike to direct sunlight. Equally important is to ride your e-bike responsibly.
If you have an issue with the controller and the e-bike itself, you can check our article “Why Does My Electric Bike Cut Out (Troubleshoot Master Guide).” for some helpful tips to fix your eBike.